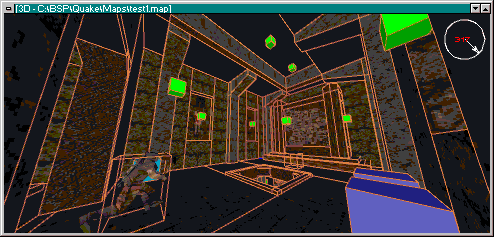
3D Window Features
This window shows a 3D preview of your scene. This can be navigated using the
current keyboard
and mouse
configuration.
Default navigation keys:
Insert: strafe left
PageUp: strafe right
Home: move up
End: move down
Delete: look down
PageDown: look up
Navigation Control:
The navigation control is found in the upper-right corner of the 3D window. The
control can be changed between three mode settings: Yaw, Pitch, and FOV. Yaw
controls the horizontal viewing angle, Pitch controls the vertical viewing angle,
and FOV (or zoom) controls the field of view. The control can be hidden via the
"Hide Control" menu option or in bsp.ini. The control modes can be changed by
right-clicking the control, or through the menu described below.
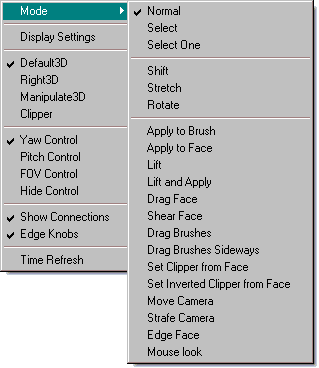
Menu:
The menu can be accessed by right-clicking the 3D Window's title bar. This
menu provides options to change the current mouse configuration, change the
navigation control, and more. The "Mode" submenu can be used to change the
action of the left mouse button.
Software vs. OpenGL
BSP can run in software or OpenGL rendering modes. This must be specified
when BSP is started and cannot be changed once it is running.
It is now recommended to run in OpenGL mode if your computer supports it. If
you aren't sure, just run BSP in OpenGL mode and see if it works or doesn't run
too slowly. OpenGL offers much faster rendering and a better-looking rendered
image. In new versions of BSP, OpenGL mode supports all of the features that
were previously available only in software mode. As well, new features will likely
be added to OpenGL mode only.
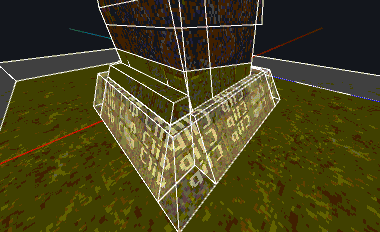
OpenGL Renderer
Software Renderer
OpenGL-Specific
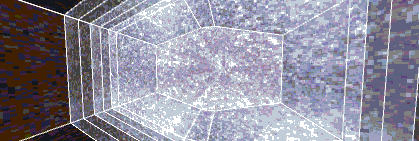
Transparency
Brushes with certain textures (water, clip, trigger) or contents/surface flags can
be rendered with translucent textures.
Screen too dark?
If the screen is too dark, there are a few options you can try.
- Disable face lighting, or increase the ambient light value. Lighting can be
disabled by setting "gl_shading" to 0 in bsp.ini, or by unchecking "GL Shading"
under the Display menu.
Alternatively, the ambient value can be changed in bsp.ini with the
"gl_ambient_color" option. Ambient color adds a base light value to the scene,
which can brighten dark spots without disabling shading. Higher values for
ambient color will reduce the contrast between lit and unlit faces. Ambient color
is stored as an RGB value that should be set to some value of gray. "0 0 0" is
black (no added light) and "255 255 255" is white (100% added light). Setting the
ambient color to white is the same as disabling lighting but likely won't give you
the same performance increase.
- Adjust gl_brightness setting
This option lightens the rendering surface. A value of 0 (default) means no
change and a value of 255 will make the screen completely white.
- Change the gamma value in [gamedir]\game.ini. The gamma setting will
affect the brightness of textures. A good value for this is about 0.6 (lighter) to 0.8
(darker).
- Look at objects head-on. With lighting enabled, faces are brighter when they
are facing directly back at the camera.
- Get a high-contrast LCD monitor. LCD monitors are generally brighter and
offer a greater range of contrast ideal for dark Quake-style palettes.
Software-Specific
Software mode is aging and the code is less frequently updated. However, it is
available if your computer doesn't have OpenGL acceleration.
Render Mode
The render mode can be set to "auto" or a fixed width.
When set to a fixed width, the rendered image will be stretched and possibly
appear distorted on screen. However, a performance increase can be gained by
using a lower setting.
"Auto" mode will use the dimensions of the 3D Window and render a non-
distorted image. Note that larger screen sizes can greatly reduce performance.
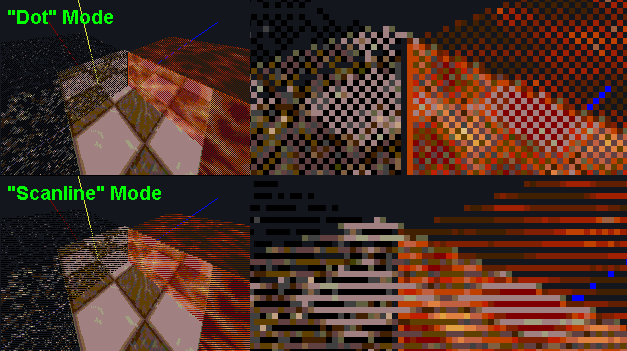
Transparency
Software mode can display brushes with certain textures or contents/surface
flags in a pseudo-transparent stippling mode. The two modes available are
"scanline" rendering every other line and "dot" rendering every other pixel.
Rendering every other line will render a little bit faster because it only has to
perform a transparency check on each line, rather than on each pixel.